App Installation
Info
This guide will walk you through installing AlyxLib using the official Installation Application
AlyxLib Installer is a user-friendly application that allows you to easily install and modify AlyxLib for addons.
You can download the installer by clicking here!
Preview
Choosing a version
AlyxLib Installer comes in two versions:
-
Self-Contained
Comes with the .NET 9 runtime needed to run the installer at the cost of a larger file size.
Recommended for most users
-
Framework Dependent
Requires the .NET 9 runtime to be installed on your computer.
Recommended for users that already work with C# or just want a small exe size
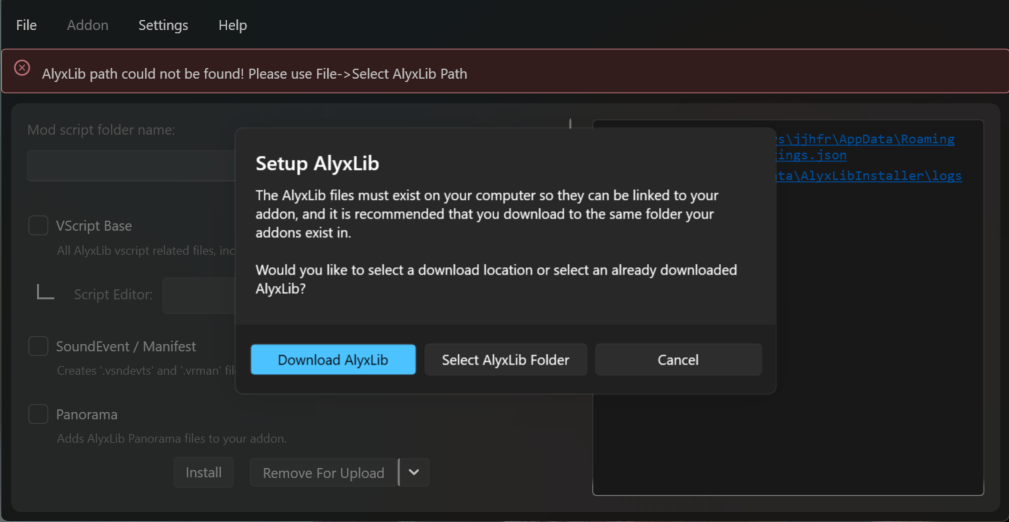
First time
When running for the first time you will be prompted to download or select AlyxLib.
-
Download AlyxLib
The latest version of AlyxLib will be downloaded to your computer at your desired location.
-
Select AlyxLib Folder
You will be prompted to select the folder that contains AlyxLib.
Image
Note
You will not be able to modify addons until a valid AlyxLib path has been set.
The installer needs permission to create symlinks, which requires either running the installer as administrator or turning on developer mode in Windows Settings.
Image
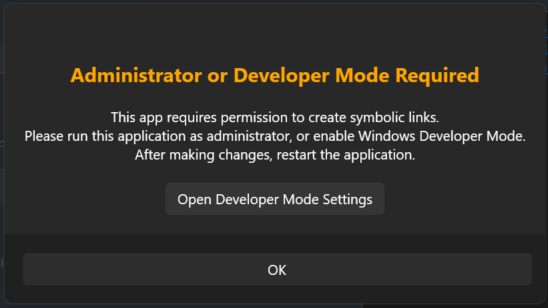
If you do not want to use either of these methods you can install AlyxLib manually by following the instructions in the Manual Installation section.
Using the installer
Note
AlyxLib settings for your addon are saved to a hidden folder in your addon's content folder called .alyxlib/config.json.
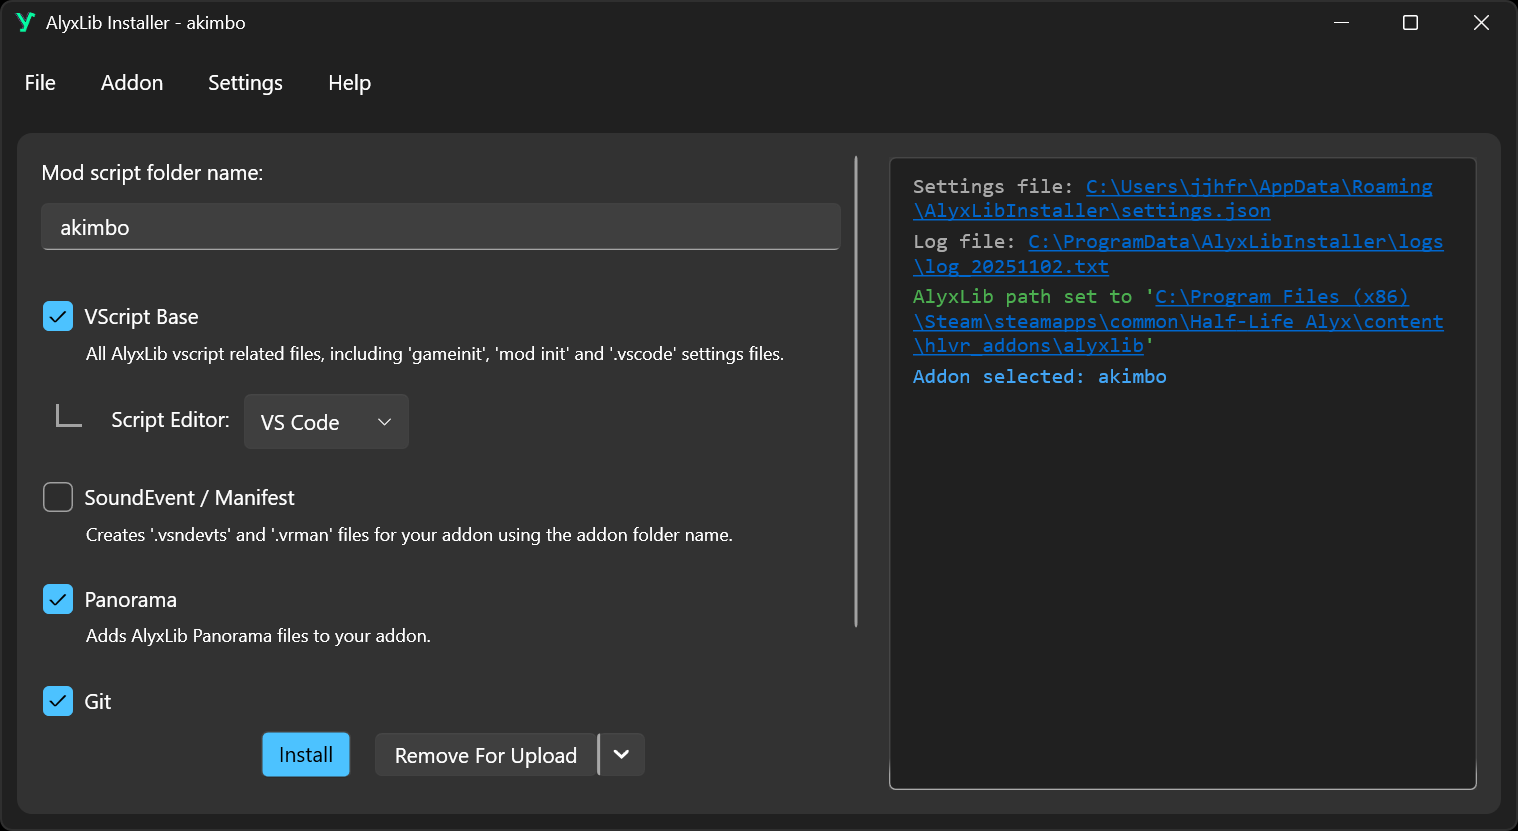
The console
The box on the right-hand side of the window contains the console output for the installer.
External links and file paths are automatically highlighted for you to click.
Text is colored based on the severity of the message:
-
White/Black: Standard
-
Blue: Important information
-
Green: Success
-
Yellow: Warning
-
Red: Error
Some text might use slightly different shades if you have Verbose Logging enabled.
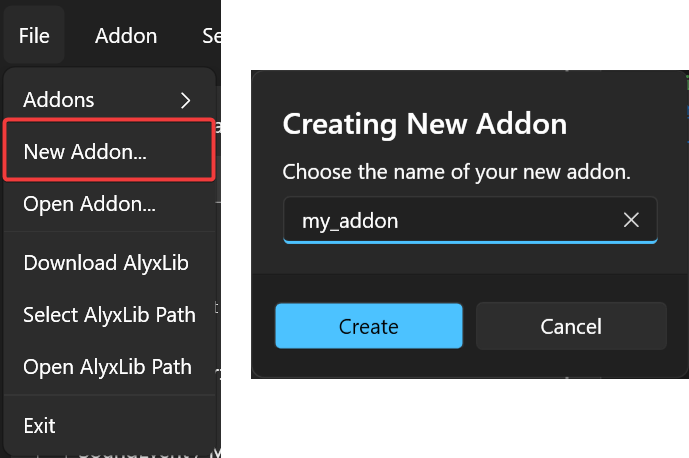
Creating a new addon
To quickly create a new addon, use File -> New Addon... and choose a name for your new addon.
Image
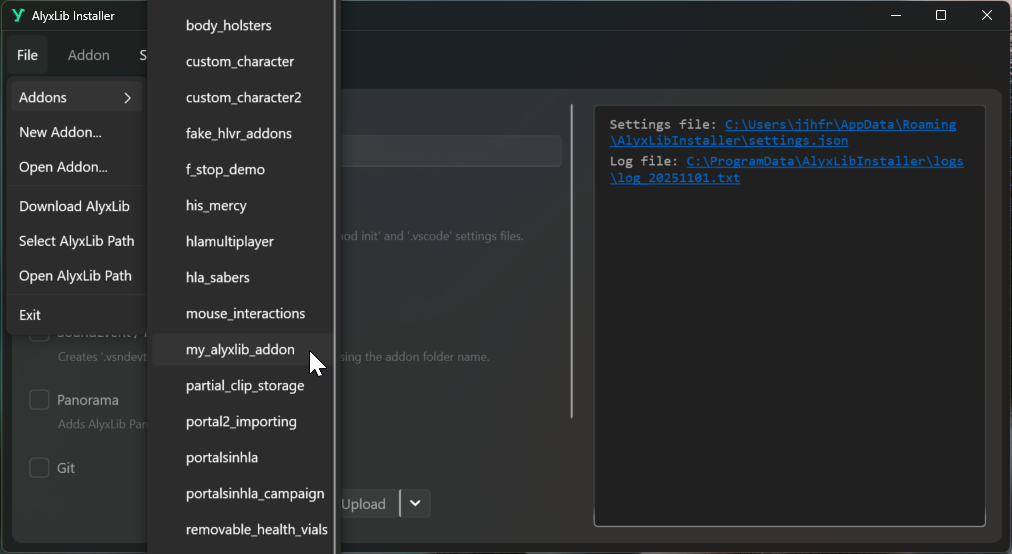
Selecting an existing addon
If your addon exists in the hlvr_addons folder of your Half-Life Alyx installation, you can select it by opening the addons list in File -> Addons.
Image
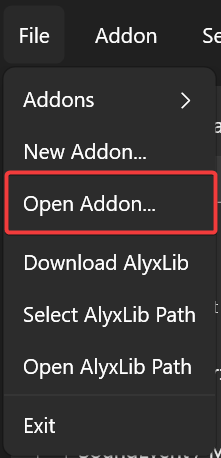
If your addon exists elsewhere, you can select it with File -> Open Addon....
Image
Adding AlyxLib to your addon
AlyxLib has 6 configuration options:
-
Mod script folder name
The name of the subfolder where scripts specific to your addon will be stored, e.g.
my_addonwill result inscripts/vscripts/my_addon/.You can change this name later but you must make sure the scripts in
mods/initare updated to point to the new name. -
VScript Base
All AlyxLib vscript related files, including 'gameinit' and 'mod init' files.
-
Script Editor
Adds default settings for the editor of your choice.
Currently only Visual Studio Code is supported. See Lua Language Server Addon Manager for how to install HLA-VScript extension.
-
SoundEvent / Manifest
Creates or renames the default soundevent and manifest files to match your addon name.
-
Panorama
Adds and compiles the AlyxLib panorama files for your addon. This is required if you want to add Debug Menu content for your addon or use the menu in tools mode.
-
Git
Initializes a Git repository in your addon folder. No initial commit is made. Git must be installed on your computer and available in your PATH.
After choosing your desired options, click Install and wait for the installer to finish. If you chose Panorama you might see a command prompt window open for a moment as the installer compiles the files.
Preparing for upload
When you're ready to upload your addon to the Steam workshop, it's important that you click Remove For Upload to temporarily remove AlyxLib files that can cause conflicts.
After the installer has finished, you may upload your addon using the Half-Life Alyx tools.
After uploading, click Install again to restore the AlyxLib files in your addon.
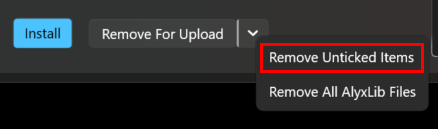
Removing AlyxLib from your addon
You can remove AlyxLib options from your addon by unticking the options you want to remove and then clicking the down arrow next to the Remove For Upload button, followed by Remove Unticked Items.
Image
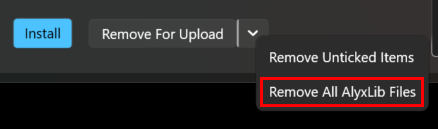
In the same menu you can also completely remove AlyxLib from your addon by clicking Remove All AlyxLib Files.
Image
This will remove any AlyxLib related files that have not been modified in your addon. Any files that do not match the contents of a fresh install will not be deleted, including soundevent files and script files.
Using file removal on upload
Use the removal list editor to control which files in your addon's game folder are affected when you click Remove For Upload.
Open the removal list editor from Addon -> Manage Removal List.
Each rule is a glob pattern that matches one or more file paths.
For each rule, you can choose one of two actions:
- Delete: Permanently deletes matching files.
- Temp Move: Temporarily removes matching files and restores them the next time you click
Install.
Note
Temporarily removed files are moved to the .alyxlib folder in your addon's content folder until AlyxLib is re-installed.
You can also start a rule with ! to exclude matching files from removal.
To edit the list:
- Click
Add Rule. - Enter the glob pattern you want to match. Prefix the pattern with
!if you want it to act as an exclusion rule instead. - Click the colored switch to choose between Delete and Temp Move.
- Click the
xbutton on that rule's row to remove that rule.
Image
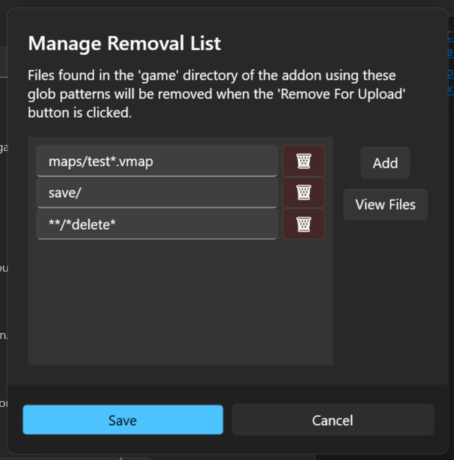
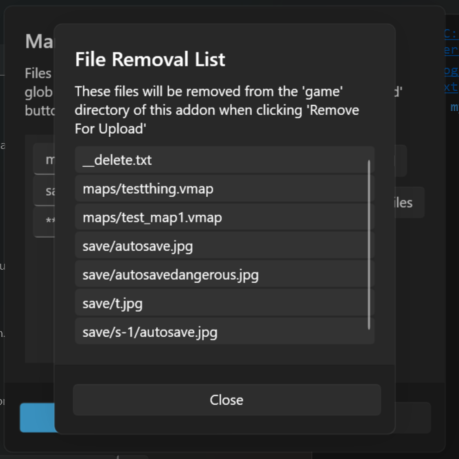
Click View Files to preview every file in your addon's game folder that matches the current rules.
Image
Click Save to store the removal list in your addon profile, or Cancel to discard your changes.
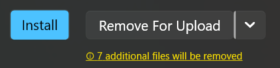
If any files match the current rules, the installer shows a note below Remove For Upload with the number of affected files. Click that note to see the full list.
Image
Settings
You can configure installer settings in the Settings taskbar menu.
-
Remember Last Addon
Remember the last addon you opened the next time you open the installer.
-
Verbose Logging
More detailed information is logged in the console for debugging and troubleshooting purposes.
-
Max Log Files
The maximum number of log files to keep. Old log files will be deleted when the maximum is reached.
-
Theme
Choose a theme for the installer.
-
Clear Console
Clears all text from the console. This does not delete any log files.
-
Add Explorer Context Menu
Adds a context menu item to the explorer right-click menu that allows you to open a selected folder in the installer.
In Windows 11 you'll need to click
Show more optionsafter right clicking to show the context menu, or Shift + Right Click to open it directly.If you rename, move or delete the installer exe, you will need to re-add the context menu item using this menu item.
-
Remove Explorer Context Menu
Removes the context menu item from the explorer right-click menu.
Troubleshooting
If you encounter any errors/exceptions, please send the relevant log file using one of the methods in Help Section
You can find the log file by clicking the file link at the top of the console output, or by navigating to C:\ProgramData\AlyxLibInstaller\logs\log_YYYYMMDD.txt where YYYYMMDD is the current date.